In this guide, we use Zapier to build an audience in Mailchimp by using External Actions
1) Mailchimp
First create your audience in Mailchimp
Audience (dropdown) > Audience dashboard > Create
Configure your audience:
- Audience name
- Default from email address
- Default from name
- Campaign URL settings
- Reminder how they signed up to your audience
- Any other settings you would like to configure
- Save
Before we start importing contacts, lets create the columns to hold the information we would like to pass through. In this example we will send through the "Sub-status" and requested "Loan amount".
Go into your audience and along the top bar select:
- Settings > Audience fields and *|MERGE|* tags > Add A Field
- For the "Sub-status" field, select Text > Fill in the field name > Fill in tag name
- For the "Loan amount" field, select Number > Fill in the field name > Fill in tag name
- Save changes

2) Zapier (Part 1)
Create an account with Zapier if you don't already have one. For this you will need to have at least a "Starter" account to be able to use the "Webhooks by Zapier" app which is categorised as a premium app.
Setting up the trigger
- Click "Create Zap"
- In the first section called "Trigger" > Search for "Webhooks by Zapier"
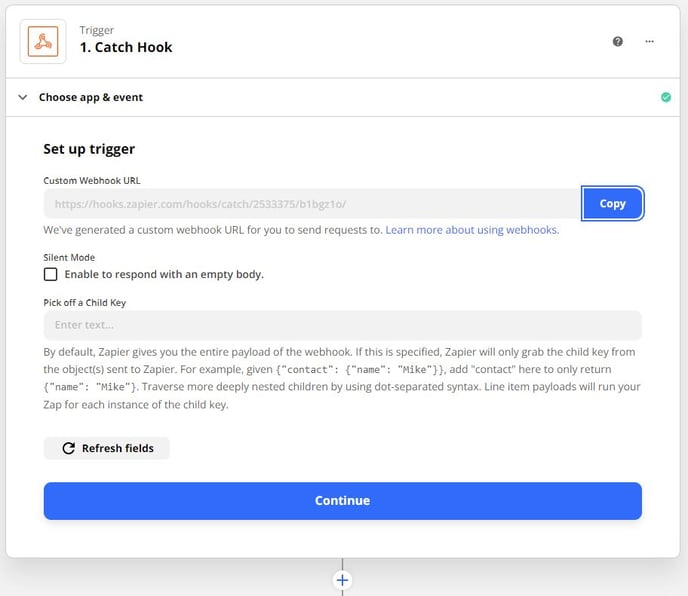
- In the "Trigger event" dropdown > Select "Catch Hook" > Continue
- This will now give you a "Custom Webhook URL". Copy this URL as we need to paste this into the AutoConvert External Actions.
- Leave this where it is for the time being, we'll be coming back later.
3) AutoConvert External Actions
Log into AutoConvert and navigate to Settings > Automation > External Actions
- Actions > Add external action
- Give it a name e.g. "Mailchimp Audience (via Zapier)"
- In the Endpoint input, paste in the URL we generated from the previous section: Zapier step 4

Image link - Now on the right hand side under the Payload tab, click Add > Object
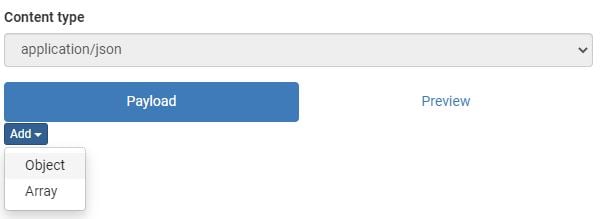
Image link - A new Add dropdown has appeared. Click this again and select Simple Replacement. This is where we will select the information from the application and give it a name.
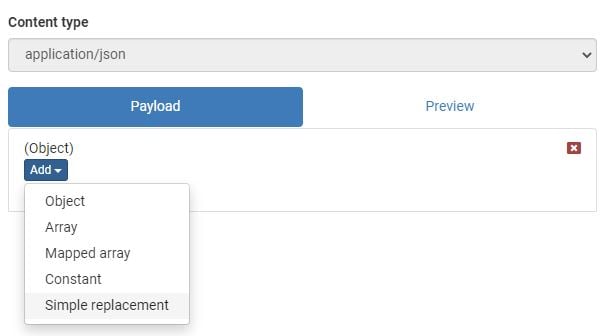
Image link - Now in the replacement box that has appeared, type "firstName" into the first input (don't use spaces in the box). Then select "Forename" from the right dropdown box. Click the green tick to save.
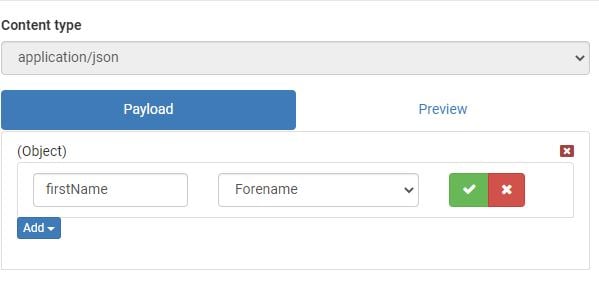
Image link - Now repeat this processes 5 & 6 until you have all the information you would like to send across to Zapier, then Mailchimp.
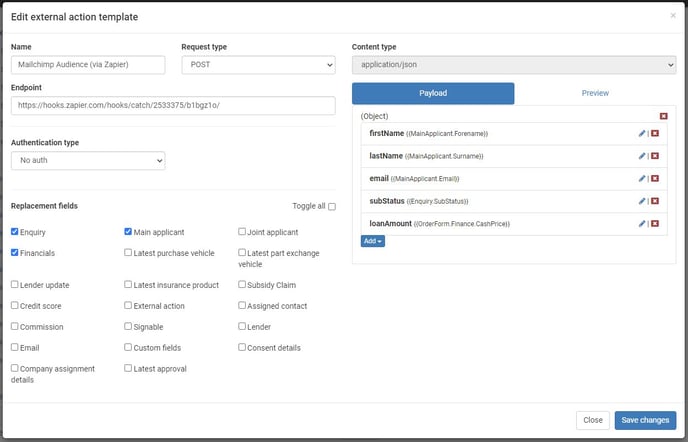
Image link
📝NOTE: Replacement field sections
In the above image, to access the loan amount, the "Financials" checkbox must be selected in the replacement fields section on the left hand side. This will then bring the financial section of the application through into the replacement fields dropdown.
Now that we have created the data within the external action, we need to trigger this send using AutoConverts automation.
Settings > Automation > Configure
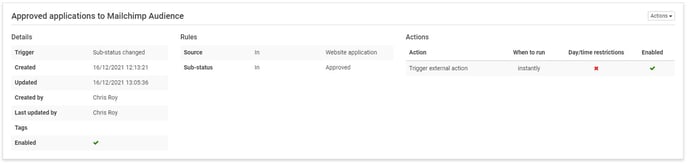
Setup example:
- Trigger: Sub-status changed
- Rules: Source = Website application, Sub-status = Approved
- Action: Trigger external action > Mailchimp Audience (via Zapier)
Testing the external action
Now choose an application to perform a test with. In this case, we will update the applications status to "Approved" to trigger the external action.
From the activity feed on the right, select Filter > Integrations (under Audit). You will now see that your external action has been executed and can preview the data sent by clicking on the "Show" link in the request section. 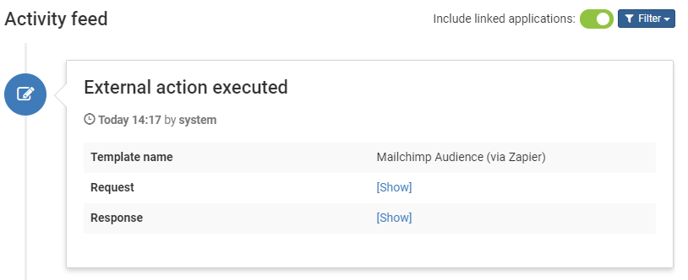
Image link
4) Zapier (Part 2)
Setting up the trigger (continued)
Head back into Zapier and click the "Continue" button from the previous screen.
You will now be on the Test Trigger screen. Click "Test trigger" and you should hopefully see the test data you sent across appear in the menu below.

Click "Continue" to finish this trigger section of Zapier.
Setting up the Action
You will now be taken to the next section where we set up what we would like to do with the data.
- Select Mailchimp from the search bar
- Action event: Add/update Subscriber
- Continue
- Sign into your Mailchimp account using the wizard then click "Allow"
- Continue
- Audience: Select the audience you created in Mailchimp
- Subscriber Email: Select the customers email address from the data we sent across from AutoConvert
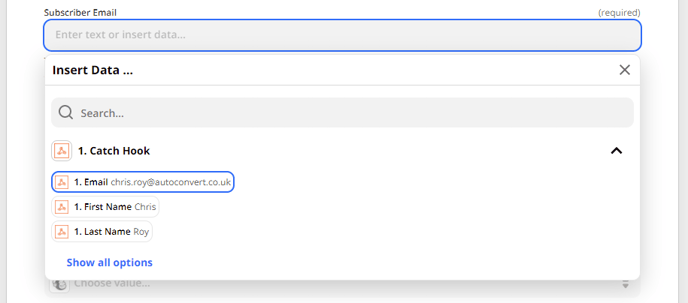
Image link - Double Opt-In: If set to True, This will send a confirmation email to the customer asking them if they confirm the subscription. Select "False" if you would like to add them straight into the audience.
- Update Existing: If the same contact is sent to Mailchimp again, choose whether you would like to overwrite the current information held or skip over this contact. If you are sending customers to Mailchimp based on multiple status updates, you should set this to "Yes" so that the "Sub-status" column in Mailchimp updates to the most recent sub-status from AutoConvert.
- Replace Groups: If you have set up any groups within Mailchimp, you can choose to add them to more or replace their current groups.
- Language code: enter "en"
- Tags: Select any tags you would like to add to the customer. These will need to be configured in Mailchimp first, but can help you organise and target contacts.
- Lastly, select the data into the fields we created in Mailchimp
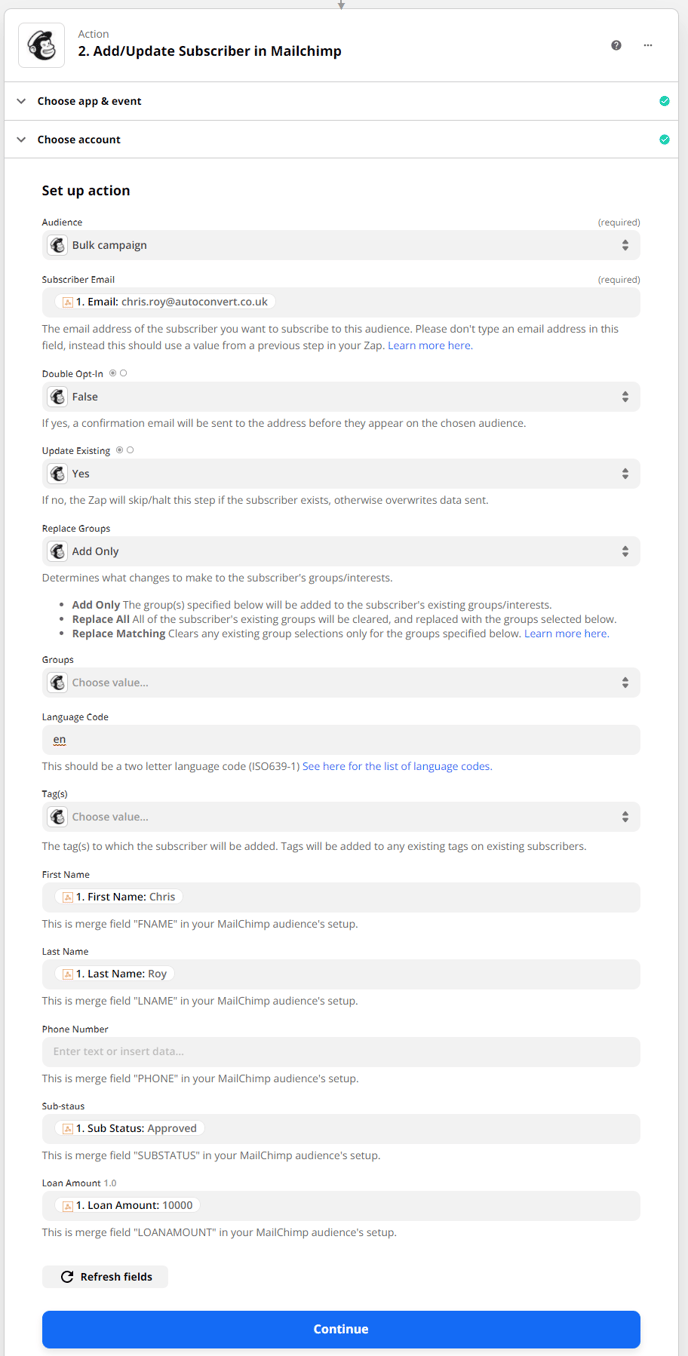
Image link - Now press "Continue"
- Click "Test & Review" or "Test & Continue"
- You should now get a successful message
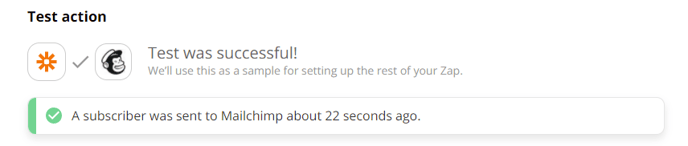
Image link - Finish by turning on the Zap
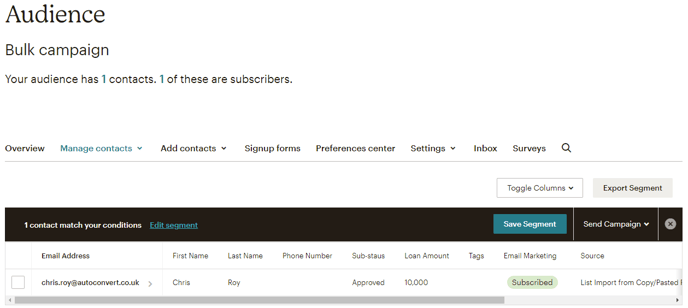
5) Finally, checking Mailchimp
Head back into your Mailchimp audience and view the contacts. You have now successfully automated adding contacts into your audience. 🙌